

Getting started with a new digital painting software can feel overwhelming, especially when it’s as feature-rich as Rebelle. Known for its highly realistic watercolors, oils, and other media, Rebelle mimics the behavior of traditional art tools, making it a favorite for artists who want a natural painting experience on a digital canvas. Whether you're new to digital painting or just starting with Rebelle, these tips will help you get the most out of this powerful program from the get-go.
1. Familiarize Yourself with the Interface
The first step to mastering any software is understanding its interface. Rebelle’s layout is intuitive, but it’s worth exploring each section: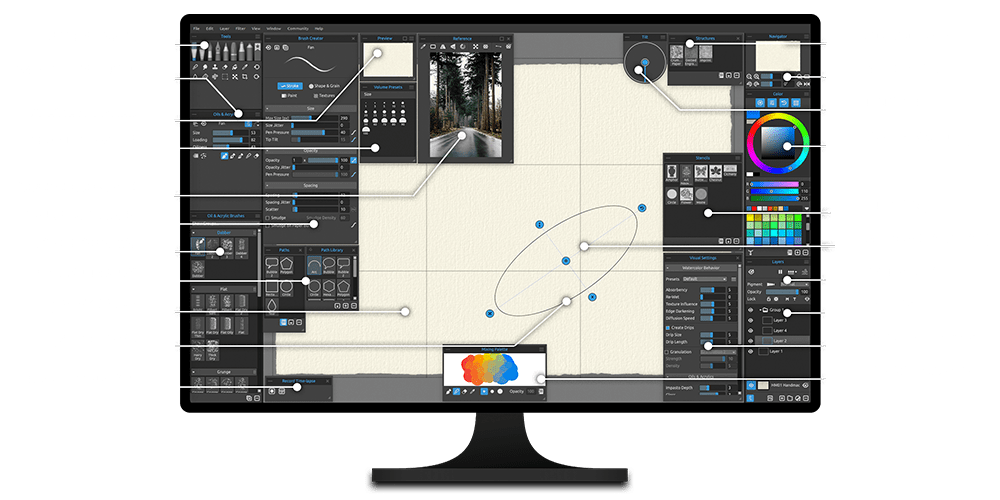 Tools and Brushes: Located on the left, you’ll find all your paint media, various tools like selection or color picker, 250+ default brushes, and their properties.
Color Wheel: On the right, Rebelle’s color wheel makes it easy to experiment with different hues and blends. Spend some time just clicking around and familiarizing yourself with where things are located. The more comfortable you are with the layout, the quicker your workflow will be.
Layers Panel: Like other digital art programs, Rebelle supports layers, which allow you to work non-destructively. You’ll find the layers panel on the right as well.
Tip for Rebelle Pro users: The Layers panel contains Pigments and Metallic Material Layer buttons, which enable color mixing based on real-world pigments and metallic-like behavior. Don’t forget to turn them on.
2. Understand the Physics Engine
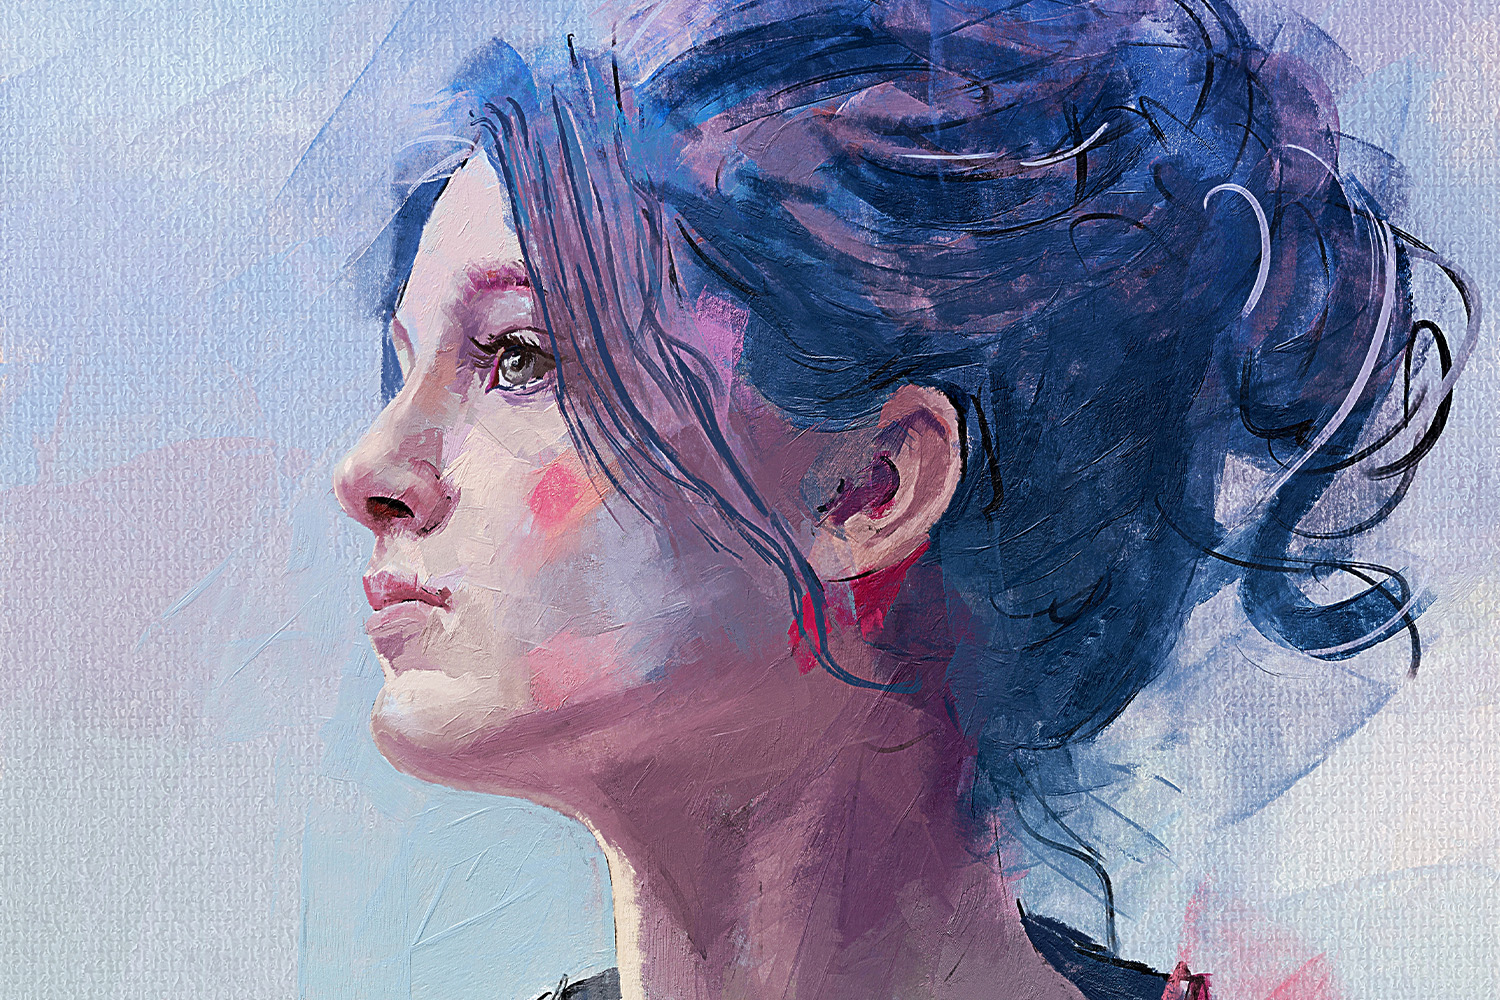
Since its first launch in 2015, Rebelle has been unique in its real-time simulation of wet and dry media. The brushes interact with the canvas and each other as they would in real life. For instance, watercolors will bleed and spread on the “paper,” while oils can mix and smudge.
Water Behavior: The software allows you to add and control water on your canvas. You can simulate the effect of wet paint blending or bleeding into dry areas. Experiment with the amount of water on your brush to create different effects. Use a Tilt tool to control the direction of the drips.
Drying Layers: You can “dry” your canvas in Rebelle with the press of a button. This will stop the spread of watercolor and allow you to work on top without affecting the previous layer. These controls are in the Layers panel.
3. Customize Your Brushes
Rebelle comes with an extensive set of preset brushes (250+), but one of its best features is the ability to customize your tools.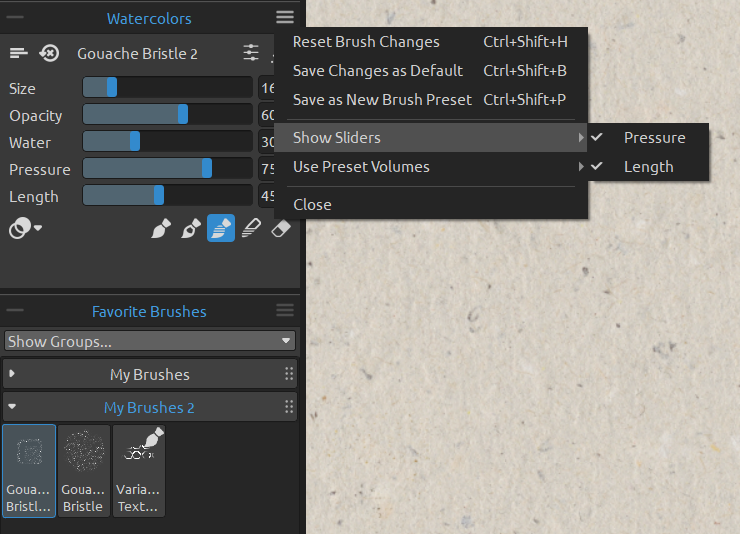 Brush Settings: In the Properties panel, tweak brush settings like size, opacity, pressure sensitivity, water load or oiliness, and stroke length. With unique blend modes, turn each brush into a painting, mixing, blending, or erasing brush while keeping its original shape.
Save Your Favorites: Once you've fine-tuned a brush, save it to your personal brush library for easy access later. This is great for creating a consistent style across multiple pieces.
Tip: Rebelle’s powerful Brush Creator provides a great opportunity to create your own brushes. If you wish to share them with others, there is a possibility for that too. Or you can download various brushes from Rebelle users from our website for free.
4. Use Layers and Blend Modes Effectively
Layers are a key component in digital art, and Rebelle's Layers panel functions similarly to other digital painting programs. This feature allows you to paint freely without worrying about ruining your progress. Organize Your Layers: Always name your layers and keep related elements separate. For example, use one layer for your background, another for your subject, and another for fine details. Group, merge, or reorganize them as you need. Add masks or filters.
Blending Modes: Rebelle has various blend modes, like Multiply, Overlay, and Soft Light, which can create interesting effects when mixing colors across layers.
5. Explore the Realistic Paper Textures
Rebelle allows you to choose from a variety of canvas textures that impact how your brushes interact with the “surface.” In addition to seven art surfaces already included in the program, there are more than 140 additional to choose from and purchase. These are sold in sets of 3 or as a bundle.
Custom Papers: Try out different paper settings for a more textured or smoother finish, depending on the effect you're going for. Change the texture scale and canvas color, and use paper heightmaps and deckled edges.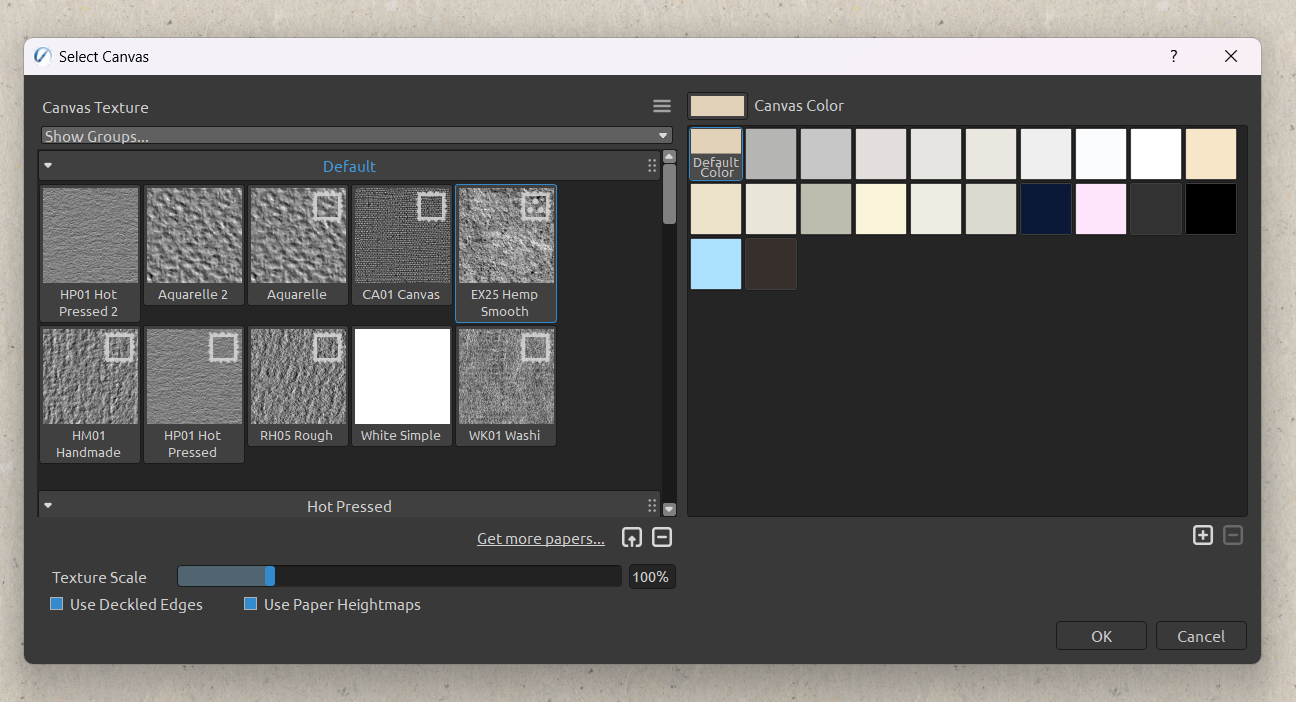
6. Use Keyboard Shortcuts to Speed Up Your Workflow
As with any creative software, mastering keyboard shortcuts can save you loads of time.
- B for Last Paint Brush
- E for Eraser
- Ctrl+Z / Cmd+Z for undo
- Tap and hold R+drag on the canvas to rotate your canvas
- Z + LMB click + move left and right to zoom in and out
- Space Bar + LMB to move the canvas
And much more. Go to Edit > Keyboard Shortcuts and learn them all, or change them according to your preference. These small actions add up to a faster workflow and let you stay in the creative flow without constantly switching tools.
7. Leverage Reference Images
If you work with reference images, Rebelle makes it easy. You can drag and drop an image directly onto the canvas or into a separate Reference window for easy viewing while painting. You can add guides that will appear on the canvas. This is especially useful for achieving realistic proportions and lighting in your work.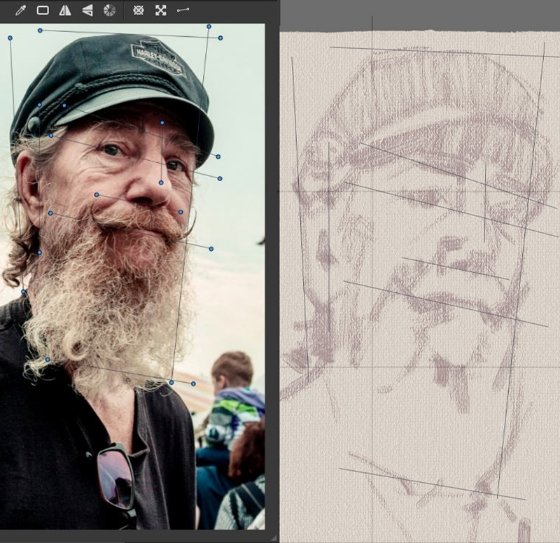
8. Practice with Watercolor and Blending Techniques
One of the reasons people love Rebelle is its natural handling of watercolor. Here are a few ways to practice and improve:
Play with Transparency: Watercolors in Rebelle work best when layered with varying levels of transparency. Use the color wheel to adjust the opacity of your brush and build up colors slowly.
Use the Blow Tool: Rebelle’s blow tool is a fun and realistic way to push watercolor around the canvas, just like blowing on wet paint to spread it in traditional painting.
Wet vs. Dry: Try wet-on-wet and wet-on-dry techniques to see how they differ in Rebelle. Wet-on-wet creates smooth blends, while wet-on-dry gives you more control over sharp edges.
9. Save Frequently and Use Autosave
It’s a good habit to save your work frequently. Rebelle does have an autosave feature, but make sure it’s activated in the Preferences, especially for larger projects. Crashes can happen, and you don’t want to lose hours of progress.
Tip for Rebelle Pro users: Work with smaller size canvases and then export your final work up to 16x larger with NanoPixel Export without losing detail.
10. Experiment and Have Fun
Perhaps the most important tip of all: don’t be afraid to experiment! Rebelle is designed to give you the freedom to create with all the joy and messiness of traditional media without the limitations of physical supplies. Try out new brushes, mix media, and push the boundaries of what’s possible. Visit our Gallery or watch the video below to see what can be achieved in Rebelle:
Need More Guidance? Go to the Help menu
Rebelle’s Help menu offers many materials that can be helpful to your creative journey in Rebelle. Understand the main features quickly by going through the Intro Tutorial. Click on Help or the “F1” shortcut and open a full-length manual where you can search for what you are looking for. If you prefer learning through videos, you can access more than 350 video tutorials on our YouTube channel.

Change Rebelle’s UI language to your mother tongue, there are 19 languages available.
Send Feedback to the Escape Motions team, speaking about your experience, ideas, or reporting a bug. Or go to the Rebelle website and get more answers or join the discussion through the Forum.
Rebelle is an incredible tool for artists seeking a balance between digital convenience and traditional art techniques. By following these tips and exploring its features, you’ll be well on your way to creating stunning, lifelike art. Now, grab your digital brushes, and let your creativity flow!
Happy Painting,
Escape Motions Team
What do you think?
0 Responses
0
Upvote
0
Funny
0
Love
0
Surprised
0
Angry
0
Sad
Sign in to comment!
Be the first to comment.